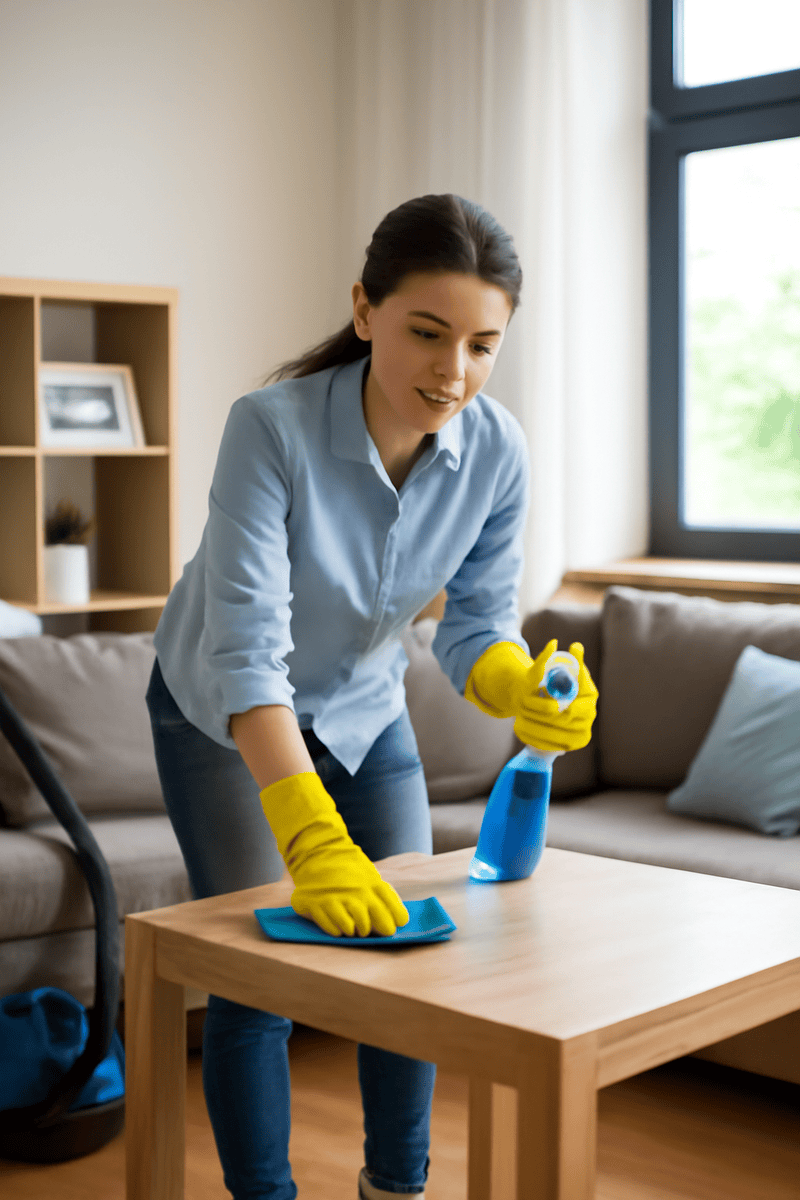
As the owner of Gloria Cleaning, I know that figuring out the difference between house cleaning and deep cleaning can be confusing. Both are important, but they serve different purposes. In this blog, I’ll explain what house cleaning and deep cleaning are, how they are different, and help you figure out which one your home needs. By the end, you’ll know exactly which type of cleaning will work best for you.
What is House Cleaning?
House cleaning, also known as regular cleaning, is about keeping your home clean with everyday tasks. It’s focused on cleaning the areas that you use most often, like the kitchen, bathroom, and living room.
Key Features of House Cleaning:
Regular Tasks: This includes wiping down surfaces, dusting, vacuuming, and mopping the floors.
Routine Cleaning: House cleaning is usually done every week or every other week to keep things neat and organized.
Focus on High-Traffic Areas: It mainly focuses on the kitchen, living rooms, bathrooms, and other areas that you use every day.
Deep cleaning is a more thorough, detailed cleaning. It goes beyond what you do with house cleaning, and it focuses on areas that don’t get cleaned as often. Deep cleaning is perfect when you need to tackle hidden dirt, stains, and areas that need a good scrub.
Key Features of Deep Cleaning:
Cleans Hard-to-Reach Areas: Deep cleaning includes areas like behind appliances, baseboards, light fixtures, and inside cabinets.
Tougher Cleaning Jobs: It involves heavy-duty scrubbing, removing grime, and cleaning places that are often missed during regular cleaning.
Ideal for Big Cleaning Days: It’s perfect for when you’re moving in or out, hosting guests, or after a big renovation.
Deep cleaning helps make your home feel brand new, and it’s great for situations where your home needs a more detailed cleaning.
Key Differences: House Cleaning vs. Deep Cleaning
1. Level of Cleanliness
House Cleaning: Aimed at keeping your home clean and organized with basic tasks.
Deep Cleaning: Goes deeper and focuses on hard-to-reach places, giving your home a thorough scrub.
2. Frequency
House Cleaning: Happens more often, usually weekly or bi-weekly, to keep things tidy.
Deep Cleaning: Is usually done less often, such as every few months, or when you need to give your home a fresh start.
3. Time and Effort
House Cleaning: Takes less time and focuses on quick tasks.
Deep Cleaning: Takes more time and effort because it focuses on detailed cleaning of every corner of your home.
When Does Your Home Need House Cleaning?
House cleaning is great when:
You want to keep things tidy and fresh on a regular basis.
You don’t have time to clean every day, but still want your home to look nice.
You’re preparing for guests or just want to keep things looking good without doing a major clean.
Regular house cleaning helps maintain a clean home, without needing to spend too much time on it.
When Does Your Home Need Deep Cleaning?
Deep cleaning is necessary when:
You’ve lived in your home for a while and it’s time for a more detailed clean.
You’re moving in or out and need a fresh start.
You’ve had a big event or renovation that left dust and grime behind.
You want to make your home sparkle and feel completely clean again.
Deep cleaning is perfect for times when your home needs more attention and extra care.
Which One Should You Choose?
Choosing between house cleaning and deep cleaning depends on what your home needs:
If you want to keep things fresh and organized regularly, house cleaning is the way to go.
If your home needs a thorough, detailed clean, or if it’s been a while since your last deep clean, then deep cleaning is best.
If you’re unsure about what you need, Gloria Cleaning can help! Our professional team can recommend the best cleaning for your home based on your situation.
Why Choose Gloria Cleaning?
At Gloria Cleaning, we offer both house cleaning and deep cleaning services to make your home look its best. Whether you need regular cleaning or a full, deep clean, our experienced team uses eco-friendly products and the best cleaning tools to leave your home spotless. We take pride in offering high-quality services that meet your needs.
Conclusion: Keep Your Home Clean and Fresh
A clean home is important for both comfort and health. Whether you choose house cleaning for regular upkeep or deep cleaning for a thorough refresh, both are key to making your home feel fresh and welcoming.
If you’re ready for a cleaner home, Gloria Cleaning is here to help with all your cleaning needs. Contact us today for professional house cleaning or deep cleaning services.
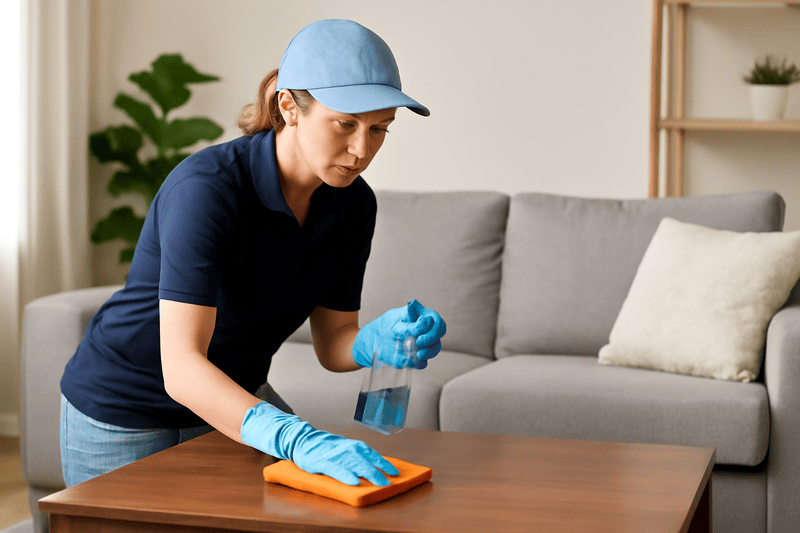
Booking a cleaning service for the first time can feel like a big decision. But don’t worry! At Gloria Cleaning, we make sure your first experience is smooth, easy, and stress-free. Here’s what you can expect when you book your first cleaning with us:
1. A Cleaning Plan Just for You
When you book with us, we don’t just give you a standard cleaning. We listen to your needs and create a plan that works for you. Do you want us to focus on certain areas, like your kitchen or bathroom? Or maybe you need a deep clean because it’s been a while since the last one? Whatever it is, we’ll make sure our team is ready to clean just how you like it.
2. Clear, Honest Pricing
One of the best parts of booking with Gloria Cleaning is that our pricing is simple and clear. You’ll know exactly what you’re paying for before we start the job. No hidden fees or surprises—just honest, up-front pricing. This way, you can feel confident that you’re getting great value for your money.
3. Easy Communication with Us
From the moment you book your cleaning, we’ll make sure you have everything you need. If you have any questions, our customer service team is here to help. We’ll send you reminders about your cleaning, and if you need to change the time or ask any questions, we’ll be happy to help. Communication is key, and we make it easy for you.
4. Professional and Friendly Cleaners
When our team arrives, you can trust that they are experienced and trained to do the job right. All of our cleaners are background-checked and insured, so you don’t have to worry about anything. We use the best cleaning tools and eco-friendly products, making sure your home or office is cleaned safely and effectively.
5. A Thorough, No-Stress Clean
Our cleaning team will get straight to work, cleaning your space from top to bottom. They’ll follow the plan we discussed and make sure every room is sparkling clean. Whether it’s dusting, vacuuming, or scrubbing, we’ll take care of everything so you can relax.
6. Follow-Up After Your Cleaning
Once we’re finished, we want to make sure you’re happy with the results. We’ll check in with you to see if you’re satisfied and if there’s anything we can improve. Your feedback helps us get better and better at what we do!
Why Choose Gloria Cleaning?
Experience: We’ve been cleaning homes and offices for years, so we know how to get the job done right.
Eco-Friendly: We use cleaning products that are safe for you, your family, and the environment.
Trusted Locally: We’re proud to serve the Bronx and nearby areas. Our customers trust us to do a great job every time.
Introduction: As the owner of Gloria Cleaning, I know how tough it can be to keep your home clean, especially in the Bronx. With busy schedules and life’s little messes, cleaning can feel overwhelming. But don’t worry! I’m here to show you some simple tips to keep your home clean, fresh, and organized. Whether you have a small apartment or a bigger house, these easy steps will help you maintain a sparkling clean home.
Why Cleaning Your Home in the Bronx is Important
Living in the Bronx means dealing with traffic, busy streets, and a lot of outdoor dirt that can easily get inside. Cleaning your home is not just about making it look nice—it’s about creating a healthy, comfortable space where you can relax. A clean home also helps reduce stress and keeps your family safe from germs.
Step-by-Step Guide to Cleaning Your Home in the Bronx
1. Declutter First
Before you start cleaning, take a few minutes to pick up things lying around. Put clothes in the laundry, pick up toys, and put away any items out of place. The less clutter, the easier it will be to clean, and your home will look better right away!
2. Dust All Surfaces
Dust can build up fast, especially in a busy city like the Bronx. Use a microfiber cloth to dust shelves, tables, and furniture. Don’t forget to clean window sills, baseboards, and ceiling fans. Microfiber cloths work best because they trap dust, instead of spreading it around.
3. Vacuum and Sweep the Floors
Once the dusting is done, it’s time to clean the floors. In the Bronx, dirt and dust can get inside quickly, so cleaning your floors regularly is important. Vacuum carpets and rugs to pick up dirt, crumbs, and pet hair. For hard floors, sweep first and then mop to remove any spills or stains.
4. Clean the Kitchen
The kitchen is one of the most important areas to clean because it’s where you prepare food. Start by wiping down countertops and cleaning appliances like the microwave, oven, and fridge. Use a degreaser for tough stains. Don’t forget to clean the sink and faucet too! A clean kitchen makes cooking more enjoyable and keeps germs away.
5. Tidy Up the Bathroom
Your bathroom needs regular cleaning to stay fresh. Clean the toilet, sink, and bathtub or shower. Use a disinfectant cleaner to remove soap scum and bacteria. Scrub the sink and faucets, clean the mirrors, and finish by mopping the floor. A clean bathroom makes you feel good and keeps things hygienic.
6. Clean Windows and Mirrors
Sparkling windows and mirrors make your home look brighter and cleaner. Use a glass cleaner or a vinegar-water mix to wipe down your windows. A microfiber cloth or a squeegee works great to avoid streaks. Don’t forget to clean the window sills and tracks too!
Tips for Keeping Your Home Clean in the Bronx
Once you’ve done a deep cleaning, it’s easy to keep your home clean with just a few quick steps:
Make a Cleaning Routine: Spend 10-15 minutes a day tidying up. Wipe down counters, put things away, and do a quick sweep of the floors.
Stay Organized: Use baskets or bins to store things and keep everything in its place. The less stuff you have lying around, the easier it is to clean.
Use Eco-Friendly Products: Many cleaning products are harmful to the environment and your health. Try using eco-friendly cleaning products that are just as effective.
Why Choose Gloria Cleaning for Your Bronx Home
At Gloria Cleaning, we know how important it is to have a clean home. We offer professional cleaning services to make your life easier. Whether you need a one-time deep cleaning or regular maintenance, we are here to help. Our team uses safe, eco-friendly products to clean every corner of your home, and we always strive for the highest quality.
Conclusion: Keep Your Home Clean and Fresh
Cleaning your home in the Bronx doesn’t have to be hard. By following these simple steps—starting with decluttering, dusting, and cleaning key areas like the kitchen and bathroom—you can keep your home fresh and inviting. Regular cleaning will make your home a peaceful, stress-free place to relax.
Cleaning your home or office is more than just tidying up. It’s an investment in the health, comfort, and appearance of your space. But many people wonder, “Why does cleaning cost so much?” or “Is it really worth it?” Today, I’m going to explain why cleaning services can be pricey and why it’s totally worth the cost.
What Affects the Cost of Cleaning?
Before we decide if cleaning is worth it, let’s first look at the things that determine the price of cleaning services. Several factors come into play:
The Type of Cleaning The kind of cleaning you need plays a big role in the cost. A regular cleaning is cheaper than a deep cleaning, which is more detailed. For example, cleaning a bathroom or kitchen might cost less than cleaning every single corner of a room and scrubbing hard-to-reach spots.
The Size of Your Space A small apartment or office will cost less to clean than a large house or building. The bigger the area, the more time and workers it takes to get everything cleaned.
How Often You Need Cleaning Regular cleaning services (like weekly or bi-weekly) are usually cheaper than one-time deep cleaning. If you clean your space regularly, it won’t get too dirty or dusty, making it quicker and easier to clean.
Where You Live The location of your home or business can also affect the price. If the cleaning service has to travel a long distance to get to you, they may charge more. Some places may also need special equipment or extra time to clean because of how hard-to-reach certain areas are.
The Condition of Your Space If your space is really dirty or has things like heavy stains, pet odor, or mold, it will take more time and effort to clean it. In these cases, the cleaning will cost more because special cleaning supplies or techniques are needed.
Why Should You Hire a Professional Cleaner?
As the owner of a cleaning service, I can tell you that hiring professionals to clean is an investment worth making. Here’s why:
Experience and Expertise We are trained to clean efficiently and effectively. We know how to clean even the hardest spots, like tough stains or high dust. Professional cleaners use the right tools and products to make sure your space gets the best clean possible.
It Saves You Time Cleaning can take a lot of time, especially if you have a busy life. When you hire professionals, you save that time for other things like relaxing, spending time with family, or focusing on your job.
Health Benefits A clean home or office is better for your health. It helps reduce the spread of germs, bacteria, and allergens that can make you sick. Regular cleaning also prevents the buildup of mold, dust, and other harmful substances that can hurt your health.
Long-Term Savings Hiring a cleaner might seem expensive at first, but it can actually save you money in the long run. Regular cleaning keeps your furniture, carpets, and appliances in better condition, which can help prevent costly repairs or replacements.
Is It Worth It?
Now, let’s answer the big question: Is cleaning worth the cost? In my opinion, yes, it absolutely is. Here’s why:
High-Quality Work As a professional, I make sure my team delivers top-quality results. We know what products and techniques to use to make your home or office look great. You won’t have to spend your time figuring out the best way to clean—let us do that for you.
Personalized Cleaning Every home and office is different, and so are its cleaning needs. Whether you have delicate furniture, stubborn stains, or high-traffic areas, we tailor our cleaning to meet your needs. This attention to detail can be hard to achieve if you’re cleaning on your own.
Peace of Mind When you hire a professional cleaning service, you don’t have to worry about missing spots or using harmful chemicals. You can relax knowing that your space is in good hands and will be cleaned properly.
How to Choose the Right Cleaning Service
To get the best value for your money, you need to pick the right cleaning service. Here are a few tips to help you choose:
Look at Reviews Reading reviews from other customers is a great way to find out if a cleaning service is good. Look for companies with positive feedback that mention reliability, quality of work, and friendly service.
Check for Insurance and License Make sure the cleaning company has the right insurance and is properly licensed. This protects you if anything goes wrong, like if something gets damaged during cleaning.
Get a Quote Ask for quotes from different cleaning services. Be sure to ask about all the costs involved, including extra fees for travel or special services.
Ask About Their Cleaning Products Some people have allergies or prefer eco-friendly cleaning products. Ask the cleaning service about the products they use to make sure they match your needs.
Conclusion: Why Cleaning is Worth the Cost
In the end, understanding the cost of cleaning helps you see that it’s more than just about the price. It’s an investment in your health, comfort, and the long-term care of your space. Whether you need a one-time deep clean or regular maintenance, the cost of cleaning is worth it for the quality, convenience, and peace of mind it provides.
If you’re looking for a professional cleaning service, visit Gloria Cleaning to learn more. We’re here to help you keep your space clean and healthy!
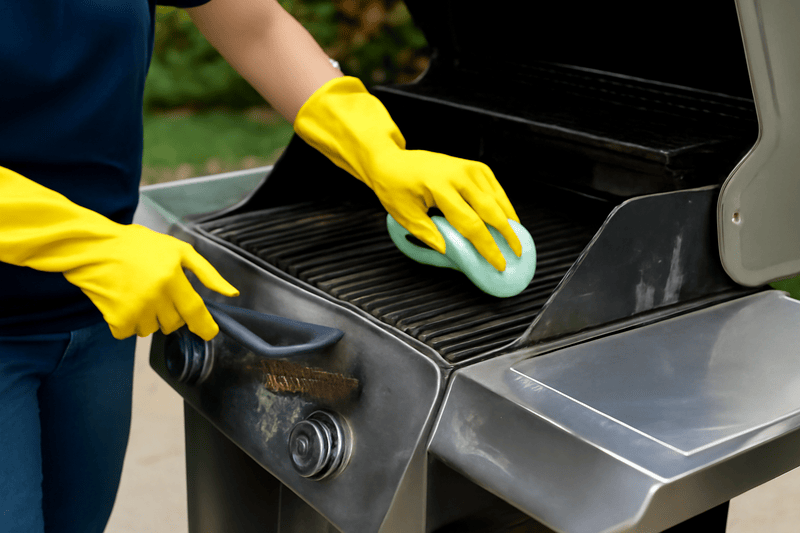
Introduction: As a cleaning expert and owner of Gloria Cleaning, I know that cleaning a grill after using a fire extinguisher can feel like a big task. Whether it’s from a small grease fire or an unexpected flare-up, fire extinguisher powder can make your grill look messy and hard to clean. But don’t worry! I’ll walk you through easy steps to clean your grill properly and safely after using a fire extinguisher. You’ll have it looking brand new and ready to use in no time!
Why You Should Clean Your Grill After Using a Fire Extinguisher
When you use a fire extinguisher, it sprays a powder that helps put out the fire. This powder can leave a mess on your grill. If you don’t clean it off, the powder could affect the taste of your food or even cause your grill to break down. Cleaning it properly is important to keep your grill safe and ready to use for your next BBQ!
Step-by-Step Guide to Clean Your Grill After a Fire Extinguisher
1. Turn Off the Gas and Disconnect the Propane Tank
Before you start cleaning, turn off the gas on your grill. If your grill uses propane, disconnect the propane tank to make sure no gas is flowing. This is important for safety.
2. Move the Grill to a Safe Area
Move your grill outside or to a well-ventilated area. This helps keep the air clean and lets you work safely. Make sure you are away from anything that can catch fire.
3. Remove the Grill Grates
Take out the grill grates, burners, and any other removable parts. This will make it easier to clean each part of the grill. Set them aside for now.
4. Brush Off the Extra Powder
Use a dry brush or small vacuum to get rid of as much of the fire extinguisher powder as you can. This will help clear the grill before you start deep cleaning.
5. Wipe Down the Grill with Warm Soapy Water
Now it’s time to clean. Mix warm water with some mild dish soap. Use a soft cloth or sponge to wipe down the entire grill, including the inside, burners, and exterior. This will remove the remaining powder and any dirt.
6. Clean the Grill Grates
Grill grates can have grease and fire extinguisher powder stuck on them. Use a stiff wire brush or grill scraper to clean them. Soak the grates in warm soapy water for 20–30 minutes, then scrub them with a sponge. Rinse them well and let them dry before putting them back on the grill.
7. Scrub the Inside of the Grill
For the inside of the grill, use a mixture of warm water and dish soap. Scrub the surfaces with a non-abrasive brush to get rid of any powder. If you find any tough spots, mix some baking soda and water to scrub them away.
8. Rinse Everything Off
Once you’ve cleaned all parts of the grill, rinse them off with clean water. Make sure you get rid of all the soap and baking soda, so nothing is left that could affect the flavor of your food.
9. Dry and Reassemble the Grill
After rinsing everything, use a clean towel to dry the grill and grates. Let everything air dry completely before putting the parts back together.
Pro Tips for Maintaining Your Grill
Regular Cleaning: Clean your grill regularly to keep it in good shape and prevent grease buildup.
Cover Your Grill: Use a grill cover to keep dirt and debris away when you’re not using it.
Deep Clean Once a Year: Even if you don’t use a fire extinguisher, do a deep clean at least once a year to keep everything running smoothly.
How to Prevent Future Grill Fires
Now that your grill is clean, here are some tips to avoid needing a fire extinguisher in the future:
Keep the Grill Clean: Regularly clean the grease trap and burners.
Don’t Leave It Unattended: Always keep an eye on your grill while it’s in use.
Check for Leaks: Before using your grill, check for any gas leaks.
Conclusion: Your Grill Is Ready for the Next BBQ!
Cleaning a grill after using a fire extinguisher may seem like a big job, but it’s simple if you follow these steps. With a little effort, your grill will be safe and ready for your next cookout. Remember, regular cleaning is key to keeping your grill in great shape and ensuring your food always tastes fresh.
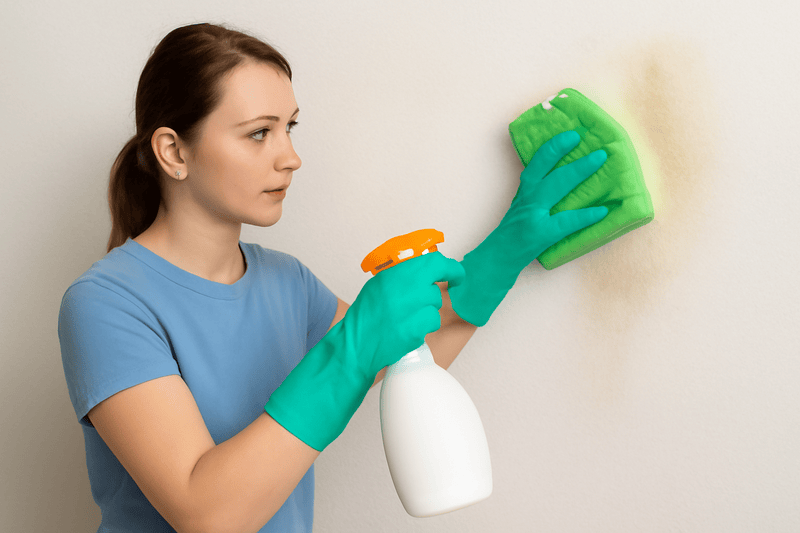
Cigarette smoke can leave behind a bad smell and tough stains on your walls. If you’ve ever tried to get rid of that smell or stain, you know it can be difficult. As a professional cleaning service, I’ve helped many people clean up after cigarette smoke, and I want to share the best cleaners that really work. In this guide, I’ll show you how to clean your walls and get rid of the smoke smell for good!
Why Is Cigarette Smoke So Hard to Clean?
Cigarette smoke sticks to your walls because of chemicals called nicotine and tar. These chemicals can leave stains and smells that are tough to remove. Over time, they can even seep into your paint or wallpaper, making them even harder to clean.
But don’t worry! With the right cleaner, you can easily remove the smoke and make your home or office smell fresh again. Here are the best cleaners I recommend to get rid of cigarette smoke from walls.
The Best Cleaners for Removing Cigarette Smoke from Walls
1. TSP (Trisodium Phosphate) Cleaner
TSP is one of the most powerful cleaning products for removing tough stains like cigarette smoke. It works by breaking down the tar and nicotine that sticks to your walls.
Effective: TSP works great on removing both stains and smells.
Safe for many surfaces: You can use it on most walls without damaging the paint.
Easy to find: You can buy TSP at most home improvement stores.
How to Use TSP:
Mix TSP with warm water. Follow the instructions on the box.
Wear gloves to protect your hands.
Use a sponge or cloth to scrub the walls with the solution.
Rinse the walls with clean water to remove any leftover cleaner.
2. Vinegar and Water Solution
If you prefer a natural cleaner, vinegar is a great option. It’s safe, affordable, and works well to remove both the stains and smells from cigarette smoke.
Eco-friendly: No harsh chemicals.
Odor-fighting: Vinegar helps neutralize bad smells, not just cover them up.
How to Use Vinegar:
Mix equal parts white vinegar and water in a spray bottle.
Lightly spray the solution on your walls (don’t soak them) and wipe with a clean cloth.
Repeat if necessary.
3. Baking Soda
Baking soda is another natural cleaner that can help get rid of smoke stains and smells. It’s gentle but very effective.
Gentle on surfaces: Won’t damage paint or wallpaper.
Absorbs odors: It helps get rid of the smoke smell.
How to Use Baking Soda:
Sprinkle baking soda on the walls and let it sit for about 10–15 minutes.
Use a damp cloth to wipe away the soda and stains.
4. Ammonia
Ammonia is a strong cleaner that can help break down nicotine and tar from the walls. But you need to use it carefully because it has strong fumes.
Strong cleaner: Works well on tough stains.
Powerful degreaser: Can handle heavy smoke residue.
How to Use Ammonia:
Mix ammonia with water (one part ammonia to two parts water).
Wear gloves and make sure the area is well-ventilated.
Use a cloth or sponge to scrub the walls.
Rinse the walls with clean water afterward.
Why Hire a Professional Cleaning Service?
While these cleaners can work, sometimes it’s best to call in a professional. A cleaning service can do the job faster and more thoroughly. Here’s why it might be worth hiring someone:
Expertise: We know the best methods and products for cleaning walls.
Time-saving: We’ll handle the hard work for you.
Long-lasting results: We can make sure your walls are completely smoke-free.
At Gloria’s Cleaning Service, we specialize in cleaning smoke damage. Our team has the right equipment to ensure that your walls are spotless, leaving your home or office fresh and clean.
Other Tips for Getting Rid of Cigarette Smoke Smell
In addition to cleaning your walls, here are some extra tips to help get rid of the smoke smell:
Use an air purifier: Air purifiers help remove smoke particles from the air.
Wash fabrics: Curtains, rugs, and furniture can hold onto smoke smells. Be sure to clean or replace them.
Ventilate your space: Open windows and use fans to help get rid of the smell.
The Bottom Line: Get Professional Help for the Best Results
Cleaning cigarette smoke from walls can be tough, but with the right tools and techniques, it’s possible to make your space smell fresh again. Whether you clean it yourself or hire a professional service, make sure you choose the best products to get the job done.
If you want help, Gloria’s Cleaning Service is here to help you get rid of cigarette smoke stains and odors. Visit our website at https://deeppink-panther-674926.hostingersite.com/ for more information or to book a cleaning.
Helpful Link: Learn More About Smoke Removal
For more tips on removing smoke odors and improving your indoor air quality, check out this article on Healthline.
By using the right cleaners and following expert advice, you can finally get rid of the cigarette smoke that’s been lingering in your home. Let’s make your space feel fresh again!
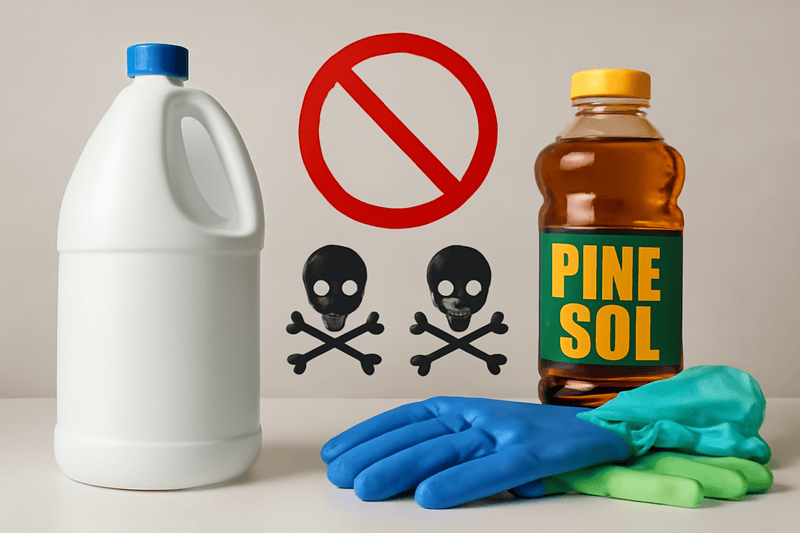
As a professional cleaner, I get asked a lot about mixing different cleaning products. One of the most common questions is: Can you mix bleach and Pine-Sol cleaner? If you’re wondering about this, you’re in the right place! Let me explain why mixing these two cleaners isn’t safe and what you should do instead to clean your home safely.
Why You Shouldn’t Mix Bleach and Pine-Sol
Bleach and Pine-Sol are both strong cleaners, but when you mix them together, they can cause dangerous chemical reactions. Bleach has sodium hypochlorite, which disinfects, and Pine-Sol has pine oil that helps clean and freshen surfaces.
When these two are mixed, they release chloramine gas, which can be very harmful to your health. Breathing in this gas can cause a lot of problems like:
Breathing Issues: Chloramine gas can make it hard to breathe and cause coughing or wheezing.
Eye and Skin Irritation: The fumes can make your eyes and skin feel irritated or even cause burns.
Long-Term Health Problems: Breathing in these gases for a long time can lead to serious health issues, especially for people with asthma or other breathing problems.
What Happens When You Mix Bleach and Pine-Sol?
Let’s look at the dangers of mixing bleach and Pine-Sol in more detail:
1. Toxic Fumes
When you mix bleach and Pine-Sol, it creates dangerous chloramine gas. Breathing in these fumes can make you feel dizzy, give you headaches, or cause nausea.
2. Chemical Burns
If the chemicals come in contact with your skin, they can cause burns and irritation. Always wear gloves when using cleaning products like bleach.
3. Health Risks
Long-term exposure to these toxic fumes can lead to serious breathing problems. It’s best to avoid this dangerous mix to protect your health.
What Should You Do Instead?
Now that we know mixing bleach and Pine-Sol is dangerous, let’s talk about what you can do to clean safely:
1. Use One Cleaner at a Time
Instead of mixing bleach and Pine-Sol, use each one for its own purpose. Bleach is good for disinfecting, and Pine-Sol is great for cleaning and making things smell fresh. You don’t need both at once to get your home clean.
2. Make Sure There’s Good Airflow
When cleaning with any chemicals, make sure the area is well-ventilated. Open windows or use fans to help get rid of any harmful fumes. This will keep you safe while cleaning.
3. Follow the Instructions
Always read the instructions on the cleaning product labels. These will tell you how to use them safely and get the best results. Following the instructions helps prevent accidents.
As a cleaning professional, my number one priority is your safety. Mixing bleach and Pine-Sol can be dangerous and cause health problems. Stick to using each cleaner separately, and always follow the instructions on the label.
As a professional cleaner, I know how tough it can be to clean dog poop from your carpet. But don’t worry—I’m here to help! Cleaning up after your dog doesn’t have to be a stressful job if you follow the right steps. Here’s a simple guide on how to clean dog poop from your carpet and keep it looking fresh and clean.
Use paper towels or a cloth to gently pick up the solid dog poop. Be careful not to push it deeper into the carpet. After picking it up, throw it in a plastic bag and dispose of it.
Step 4: Blot, Don’t Rub!
If there’s a stain left on the carpet, don’t rub it. Rubbing will only push the stain further into the carpet. Instead, gently blot the area with a clean paper towel or cloth. Keep blotting until no more poop comes off the carpet.
Step 5: Make a Cleaning Solution
Now it’s time to clean the stain. Mix equal parts of white vinegar and water in a bowl. Vinegar is a great cleaner and will help get rid of the stain and smell. If you prefer, you can also use a store-bought cleaner made for carpets and pets.
Step 6: Clean the Stain
Dab the cleaning solution onto the stained area using a cloth. Let it sit for about 5–10 minutes to work on the stain and odor. Make sure the solution covers the whole stain.
Step 7: Rinse and Dry
Once the stain is cleaned, use a little water to rinse the area. Blot the area with a clean towel to soak up any extra water. It’s important to dry the carpet to stop any mold or bad smells from forming. You can let it air dry or use a towel to help dry it faster.
Step 8: Use Baking Soda to Freshen Up the Carpet
To make your carpet smell fresh, sprinkle baking soda over the cleaned area. Let it sit for 15–20 minutes to absorb any remaining smells, and then vacuum it up. Your carpet will smell clean and fresh!
Why Call in the Professionals?
While cleaning up dog poop on your own is possible, sometimes it’s better to let professionals handle it. Our cleaning service, Gloria Cleaning, can deep clean your carpet and make sure all stains and odors are gone. We use eco-friendly products and advanced cleaning methods to keep your carpets looking like new.
Conclusion
Cleaning dog poop from your carpet is easy if you follow these steps. Just be sure to clean up quickly and use the right tools. If you need extra help, our team is here to make your carpets look and smell great. Don’t hesitate to reach out if you need any professional cleaning services!
To learn more about how to keep your carpets clean and fresh, check out this helpful guide on maintaining your carpets.
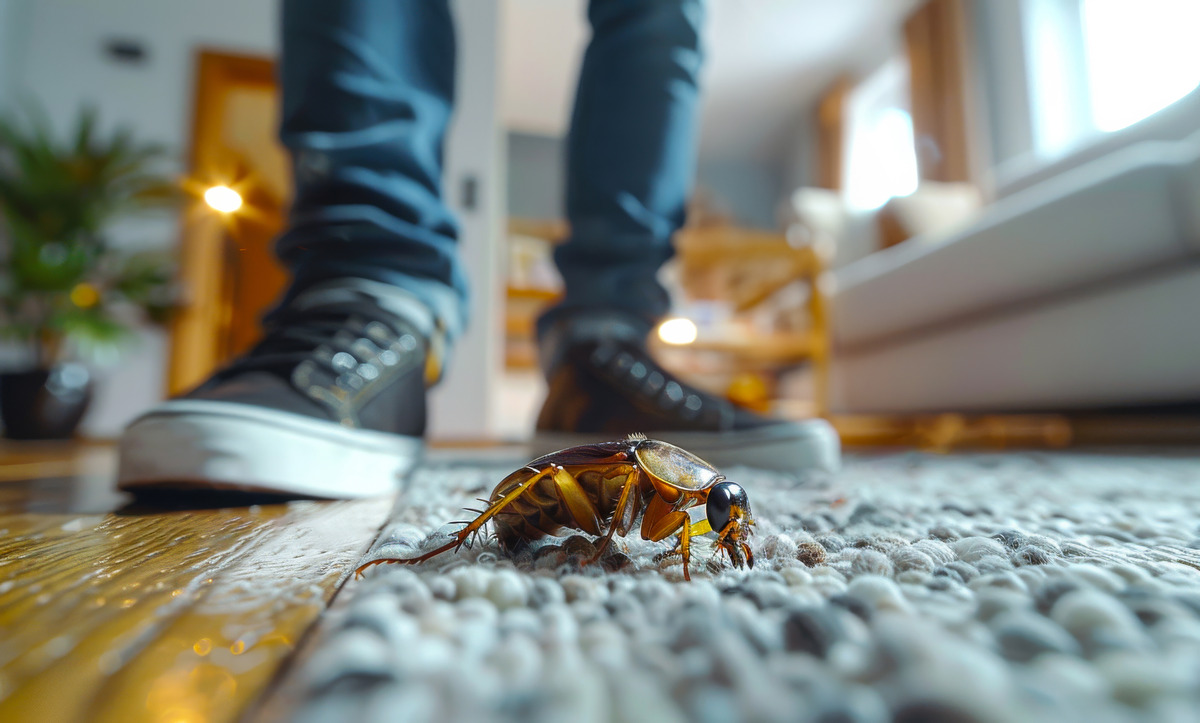
If you’re like me, you might wonder why roaches keep showing up even though your house is clean. I work hard to keep my home spotless, so why are these creepy crawlers still around? Well, it turns out that roaches can invade even the cleanest houses. In this blog, I’ll explain some surprising reasons why roaches may show up in a clean house and what you can do to get rid of them.
Why Do Roaches Appear in Clean Houses?
Roaches are tough and can survive in many different places, even clean ones. Here’s why:
1. They’re Looking for Food and Water
Roaches only need a tiny bit of food or water to survive. Even if you keep your kitchen clean, they can find crumbs or small spills you might not notice. Make sure to clean under the fridge, stove, and other appliances, and check for leaks that can give them water.
2. They Hide in Dark Places
Roaches love dark, hidden spots where no one will bother them. They might be hiding behind furniture or inside cabinets. Even though your house looks clean, they can be living out of sight.
3. Cracks and Gaps in the Walls
Roaches can slip in through tiny cracks or holes around your house, like in the walls, around doors, or windows. Even if the inside of your house is spotless, roaches can find a way in through these gaps. It’s a good idea to check for and seal any cracks around your home.
4. Your Environment Matters
Sometimes, it’s not about your cleaning habits. If you live in a humid area or near places where roaches are common, like dumpsters or trash piles, they are more likely to invade. Roaches are always looking for a safe place with food, water, and shelter.
5. They’re Just Looking for a Place to Live
Roaches are always searching for places to hide, breed, and live. If your home offers warmth, food, and water, they will see it as a good place to settle. Even if your house is clean, it can still seem like a nice home for them.
How to Keep Roaches Out of Your Clean House
Now that we know why roaches might be around, let’s talk about what you can do to keep them away:
1. Seal Cracks and Gaps
Look around your home for any cracks or holes that roaches can sneak through. Seal them with caulk or weatherstripping to keep them out.
2. Keep Cleaning Regularly
Even though your house is clean, don’t forget to clean behind the fridge, stove, and other appliances. Roaches love to hide there, so make sure to clean those hidden areas too.
3. Fix Water Leaks
Roaches need water, so check for any leaky pipes or faucets and fix them as soon as possible. Don’t leave water sitting in the sink or on the floor after washing dishes.
4. Use Natural Roach Deterrents
Try using natural things like boric acid or essential oils, such as peppermint, to keep roaches away. These are safer for your home and can help stop the roaches from entering.
5. Call a Professional
If you have a roach problem that you can’t handle, it might be time to call a pest control expert. They can help get rid of the roaches and make sure your home stays clean and safe.
Conclusion
Having roaches in a clean house doesn’t mean you’re not cleaning enough. It’s usually about the environment around your home, cracks and gaps where roaches can get in, and the fact that roaches are great at hiding. By sealing cracks, cleaning regularly, fixing leaks, and using natural deterrents, you can keep these pests out. If it gets too much, don’t hesitate to call a professional cleaning or pest control service to make sure your home stays roach-free.
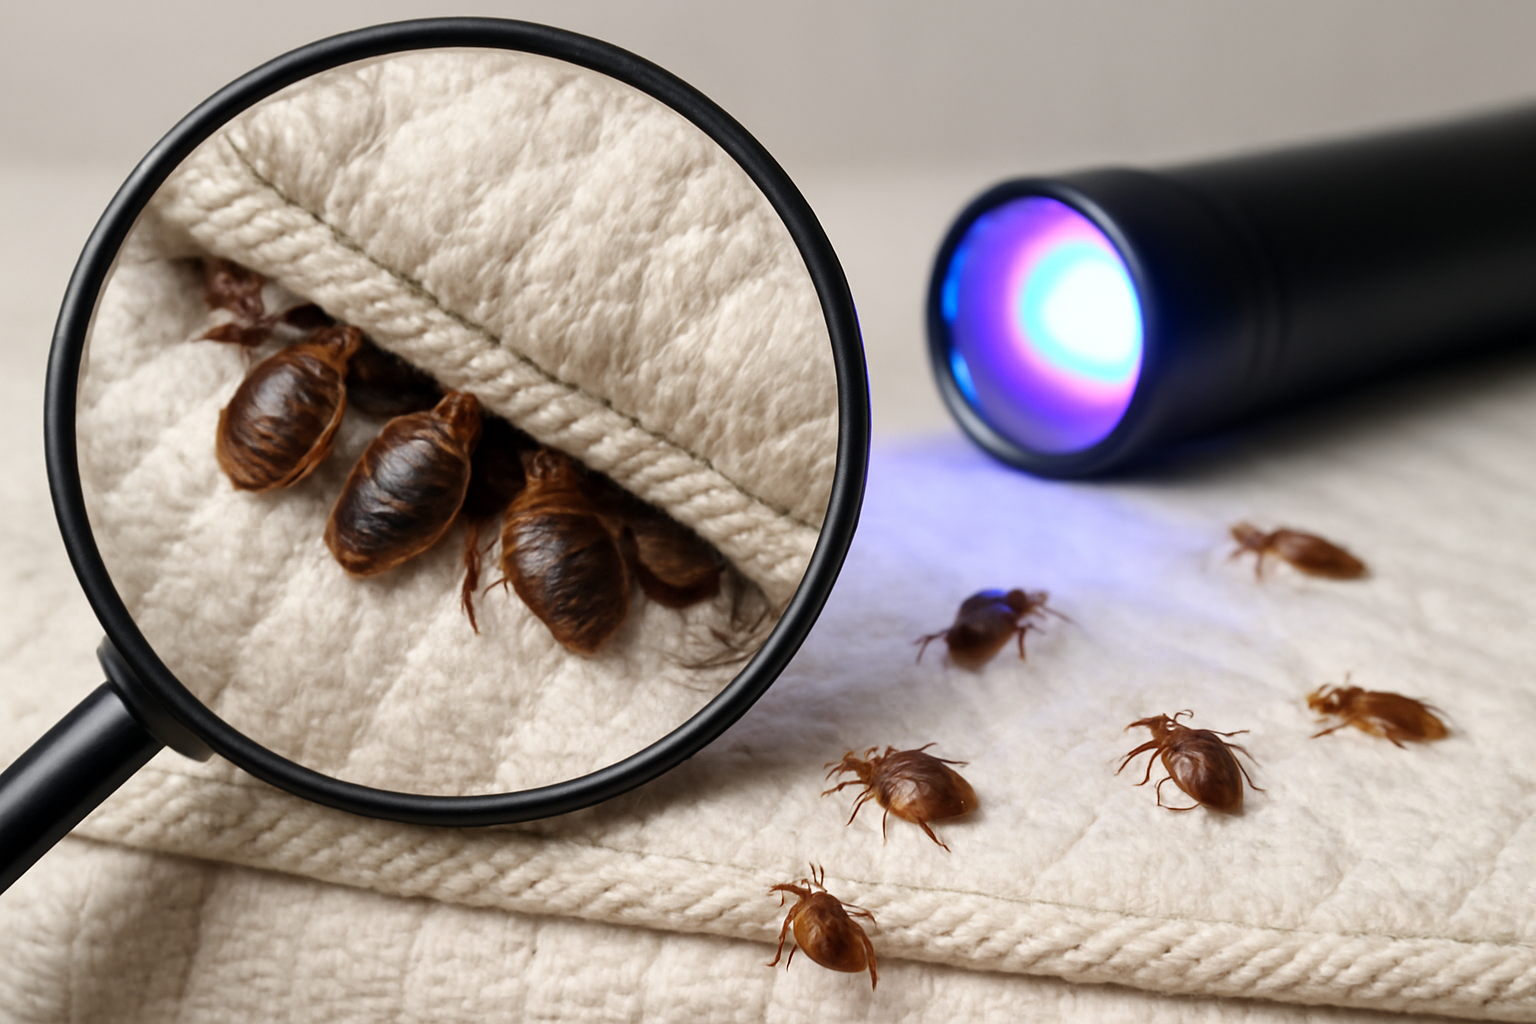
As a professional cleaner, I get a lot of questions about bed bugs. These tiny pests are tough to get rid of, and many people are looking for ways to eliminate them. One common question I hear is, “Can UV light kill bed bugs?” In this blog, I’ll explain why UV light isn’t the best solution for dealing with bed bugs.
What Are Bed Bugs?
Before we talk about UV light, let’s understand what bed bugs are. Bed bugs are small, brown insects that feed on the blood of humans. They often hide in places like your mattress, furniture, and cracks in walls. Bed bugs are hard to see, and they come out at night to feed. Their bites can make your skin itchy and uncomfortable.
Can UV Light Kill Bed Bugs?
The answer is no, UV light cannot kill bed bugs. While UV light is good at killing germs and bacteria, it doesn’t work on bed bugs. Here’s why:
1. UV Light Doesn’t Reach Bed Bugs’ Hiding Spots
Bed bugs like to hide in tiny cracks and dark places. UV light can’t reach these spots, so it can’t kill the bed bugs hiding there. It needs to shine directly on the bugs to be effective, but bed bugs are really good at hiding.
2. UV Light Isn’t Strong Enough
Even though UV light can kill some germs, it doesn’t have the power to kill bed bugs. Bed bugs are tough, and they would need to be exposed to very strong UV light for a long time to be killed. This makes UV light not practical for killing them.
3. No Proof It Works on Bed Bugs
There is no proof that UV light kills bed bugs. While UV light can kill some smaller pests, there is no scientific evidence that it works for bed bugs. So, it’s not a recommended solution.
What Are the Best Ways to Kill Bed Bugs?
Since UV light doesn’t work, here are some better ways to get rid of bed bugs:
1. Heat Treatment
Heat treatment is one of the best ways to kill bed bugs. Bed bugs can’t survive in high temperatures. Professional pest control companies use heat to kill bed bugs by raising the temperature above 120°F (49°C). This kills the bugs at every stage of life.
2. Pesticides
Pesticides that are made for bed bugs are also effective. These products can kill bed bugs on contact. Just make sure to use the right pesticide and follow the instructions carefully to stay safe.
3. Vacuuming and Steam Cleaning
Vacuuming is a good way to remove bed bugs from cracks and crevices. It won’t get rid of all of them, but it can help. Steam cleaning is also great because the heat from the steam kills bed bugs on contact. This is a good method to use along with other treatments.
4. Call a Pest Control Expert
If you have a big problem with bed bugs, it’s best to call in a professional pest control company. They have the tools and knowledge to get rid of the bed bugs and prevent them from coming back.
Conclusion: Should You Use UV Light for Bed Bugs?
In conclusion, UV light cannot kill bed bugs. It might be good for disinfecting things, but it won’t help with bed bugs. If you want to get rid of bed bugs, use proven methods like heat treatment, pesticides, and professional pest control services.