As a professional cleaner and the owner of Gloria Cleaning, I know that mold removal is one of the most important services to keep your home or business safe and healthy. Mold can spread quickly and cause serious damage to your property and health. Before you schedule mold removal, it’s good to know how much mold removal costs, since prices can change based on several factors. In this blog, I’ll break down the cost of mold removal and explain how you can get the best value for your money while making sure your space is mold-free.
What is Mold Removal?
Mold removal, also called mold remediation, is the process of finding and removing mold from your home or business. The process includes cleaning mold off surfaces, fixing the moisture that caused the mold, and stopping it from coming back. The steps for mold removal usually include:
Inspection and Assessment: A professional looks for mold and checks how bad it is.
Containment: The area with mold is sealed off to prevent it from spreading.
Mold Removal: The mold is cleaned from surfaces and materials.
Air Filtration: Special equipment is used to clean the air of mold spores.
Drying and Dehumidification: The area is dried completely to stop mold from growing back.
Repairs: If mold has caused damage, it might need to be fixed or replaced.
What Affects Mold Removal Cost?
The cost of mold removal depends on several things. Here are the main factors that can change the price:
1. Size of the Area Affected
The bigger the area with mold, the more expensive the removal will be. Small spots, like a bathroom or closet, will cost less to clean. But larger areas, like a basement or attic, will cost more because there’s more work to do.
2. Type of Mold
Not all mold is the same. Some types of mold, like Aspergillus or Penicillium, are easier to clean, so the cost is lower. But Black Mold (Stachybotrys chartarum) is more dangerous and harder to remove, which makes it more expensive to get rid of.
3. Location of Mold
Mold in hard-to-reach places, like behind walls or under floors, will cost more to remove. These areas need special equipment and extra time to clean properly.
4. Extent of Damage
If mold has caused a lot of damage to things like wood, drywall, or insulation, it will cost more to fix or replace those materials. This can add to the overall cost of mold removal.
5. Moisture Source
Mold grows because of moisture. If the mold is caused by things like a leaky roof, plumbing problem, or bad ventilation, it’s important to fix the moisture issue before removing the mold. This may add extra cost to the removal process.
Average Mold Removal Costs
Mold removal costs can vary a lot depending on the size of the area and the type of mold. Here’s a general idea of what to expect:
Small Mold Removal (Under 10 sq. ft.): Small areas, like a bathroom or closet, can cost anywhere from $500 to $1,500.
Medium Mold Removal (10-100 sq. ft.): This can cost between $1,500 and $3,000. This is common for mold in bigger spaces like basements or larger bathrooms.
Large Mold Removal (Over 100 sq. ft.): For big mold problems, the cost can range from $3,000 to $6,000 or even more, especially if the mold covers a large area like an attic or a whole basement.
Black Mold Removal: Black mold removal usually costs more because it’s dangerous. Prices for black mold removal range from $2,000 to $7,000, depending on how big the affected area is.
How to Save on Mold Removal Costs
While mold removal can be expensive, there are ways to save money:
Act Fast: The quicker you deal with mold, the less it will spread. If caught early, it will be cheaper to fix.
Get Multiple Quotes: Ask a few companies for quotes before you pick one. Make sure each quote includes a list of services so you don’t get charged extra later.
Prevent Future Mold Growth: Make sure the cause of the mold (like a leak or poor ventilation) is fixed. This will stop the mold from coming back, saving you money in the future.
Negotiate Repairs: If the mold has caused damage, ask if the company can include repairs in the price. Some companies offer a package deal that includes both mold removal and repairs.
Why Choose Gloria Cleaning for Mold Removal?
At Gloria Cleaning, we know how important it is to handle mold quickly and safely. Our team is trained and ready to remove mold, fix the cause of moisture, and ensure your space is mold-free. Here’s why you should choose us:
Experienced Technicians: Our team knows how to safely and effectively remove mold.
Full Services: We take care of everything, from inspection to repairs.
Eco-Friendly: We use environmentally safe cleaning products whenever possible.
Fair Pricing: We offer affordable pricing with no hidden fees.
Conclusion
Understanding how much mold removal costs is key to dealing with mold problems. The price will depend on the size of the area, the type of mold, and how bad the damage is. But acting fast and choosing a good cleaning company can help keep costs down.
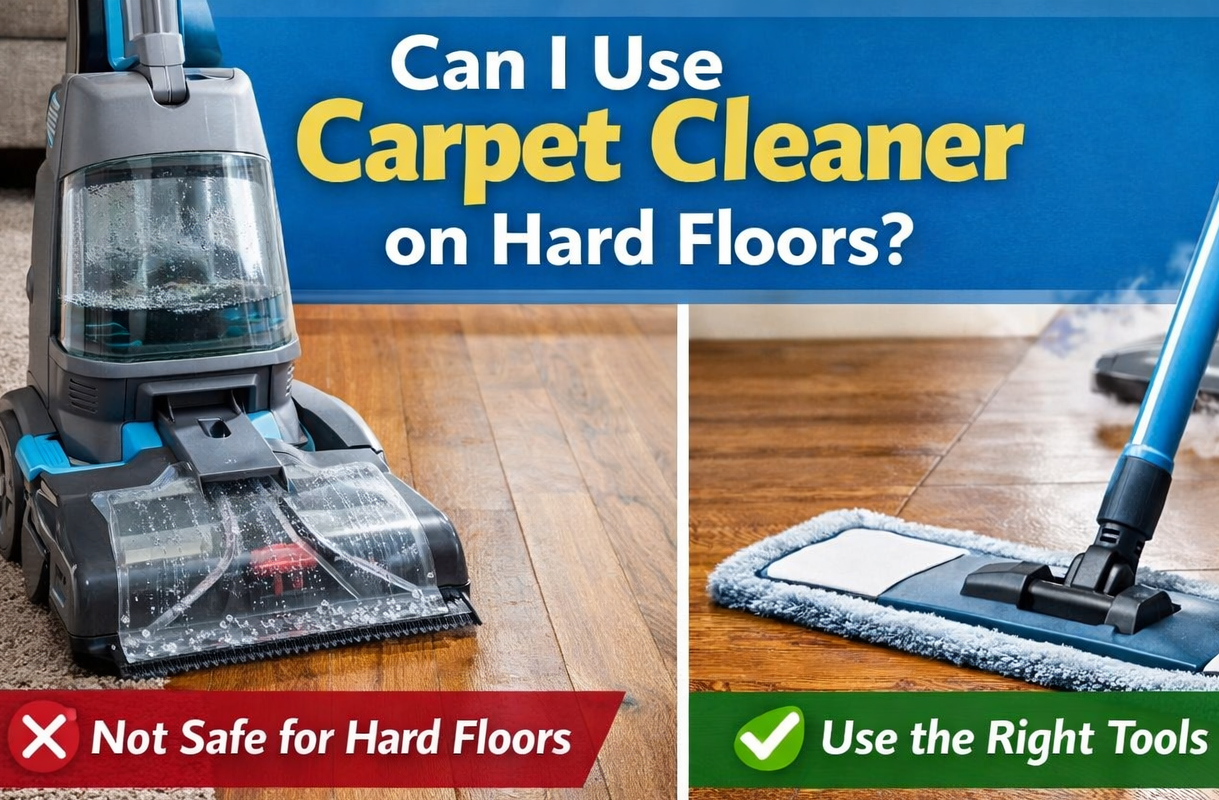
As a cleaning expert, I get asked all the time if it’s okay to use a carpet cleaner on hard floors. Whether you’re trying to clean your kitchen tiles, wood floors, or any other hard surface, the answer isn’t always simple. In this post, I’ll explain why using a carpet cleaner on hard floors might not be the best idea and how to clean them the right way.
What’s the Difference Between Hard Floors and Carpets?
Hard floors like wood, tile, vinyl, or stone are different from carpets. Carpet cleaners are made to clean soft fabrics, but hard floors need special cleaning solutions. If you use a carpet cleaner on hard floors, it might not clean properly and could even damage the floor.
What Could Happen If You Use a Carpet Cleaner on Hard Floors?
Residue Left Behind: Carpet cleaners are designed to leave a cleaning solution in the carpet fibers. On hard floors, this can leave a sticky residue that attracts dirt quickly, making your floors dirty again faster.
Damage to the Surface: Carpet cleaners, especially those with spinning brushes, can scratch and damage delicate surfaces like wood floors or tiles. Over time, this can cause permanent damage.
Not Enough Cleaning Power: Hard floors often need more than just a spray and suction. You need cleaning products that can break down grease, grime, and stains, which carpet cleaners aren’t made to do.
What’s the Best Way to Clean Hard Floors?
Use the Right Cleaner: The best way to clean hard floors is by using a cleaner made for that specific type of floor. For wood floors, use a wood floor cleaner, and for tiles, use a cleaner made for stone or grout.
Microfiber Mop: A microfiber mop works great for cleaning hard floors. It picks up dirt and dust without scratching the surface, and it leaves your floors streak-free.
Steam Clean for Tiles & Grout: If you have tile floors, a steam cleaner is an excellent choice. It helps clean the grout lines and gets rid of dirt without needing harsh chemicals.
Can I Use a Carpet Cleaner on Hardwood Floors?
Now, you might be wondering, can I use a carpet cleaner on hardwood floors? The short answer is no. The water and cleaning solution from carpet cleaners can get into the wood and cause damage like warping or staining. It’s best to use a cleaner that’s made just for hardwood floors.
Conclusion: The Right Way to Clean Your Hard Floors
Even though using a carpet cleaner on hard floors might seem like an easy option, it’s not the best choice. It can leave your floors dirty or even cause damage over time. Instead, use a cleaner made for hard floors and the right tools for the job.
At Gloria Cleaning, we know exactly how to clean all kinds of floors safely and effectively. If you’re unsure what to use or need help cleaning your floors, reach out to us! We’re here to help your home or office stay clean and beautiful.
Why You Can Trust Gloria Cleaning
With 9 years of experience in cleaning, Gloria Cleaning is a name you can count on. Our team uses the latest cleaning products and tools to make sure your floors are clean and protected. Whether it’s hardwood, tile, or another surface, we’ve got you covered.
If you need help cleaning your hard floors or have any questions, contact Gloria Cleaning today. We’re happy to help you get your space looking its best!
Keeping your home clean is important, but how often should you hire a professional cleaning service? It depends on a few things like how big your home is, how busy your life is, and how much cleaning you want to do yourself. In this blog, I’ll explain how often you should think about getting a professional cleaning service for your home.
Why Regular Professional Cleaning is Important
A clean home isn’t just about making it look nice. It’s also about feeling healthy and comfortable. Here’s why having professional cleaners is important:
Healthier Home Dust, dirt, and allergens can build up fast. Cleaning regularly with the help of professionals makes your home healthier, especially if anyone in your family has allergies. A cleaner home means cleaner air, which is better for everyone.
Save Time Cleaning takes time, and we’re all busy. When you hire a cleaning service, you can spend your time doing other things you enjoy, like relaxing or spending time with your family. It takes the pressure off, so you don’t have to worry about cleaning all the time.
Expert Cleaners Professional cleaners know exactly how to clean and use the right tools and products to get the job done. They can reach spots you might miss and clean places that are hard to get to, like behind furniture.
How Often Should You Hire a Cleaning Service?
How often you should hire a cleaning service depends on your home and how much cleaning you need. Here are some suggestions:
1. Weekly Cleanings: Best for Busy Homes
If you have a big family, pets, or a lot of foot traffic, weekly cleanings are a great idea. Pets and kids can make messes quickly, and weekly cleaning helps keep your home looking tidy and fresh.
A typical weekly cleaning includes:
Vacuuming and mopping floors
Wiping down surfaces like tables and counters
Cleaning bathrooms and kitchens
Taking out the trash
This keeps your home in great shape every week.
2. Bi-Weekly Cleanings: For Smaller or Less Busy Homes
If you have a smaller family or live alone, bi-weekly cleanings might be enough. This is a good option if you can do light cleaning like wiping counters or dishes between cleanings.
A typical bi-weekly cleaning includes:
Cleaning floors
Dusting surfaces
Cleaning bathrooms and kitchen
Tidying up
Bi-weekly cleanings are perfect if you don’t need a cleaning every week but still want to keep things clean regularly.
3. Monthly Cleanings: For Low-Traffic Homes
If you live alone or your home doesn’t get much use, monthly cleaning might be all you need. This option is for people who don’t mind doing basic cleaning themselves and only need a deep clean once a month.
A monthly cleaning includes:
Cleaning floors and carpets
Dusting hard-to-reach places
Sanitizing bathrooms and kitchen
Cleaning windows and mirrors
Monthly cleanings give your home a thorough clean every month, but they’re less frequent than weekly or bi-weekly cleanings.
4. One-Time Deep Cleanings: For Special Occasions
Sometimes, you might need a deep cleaning just once, like before or after moving, hosting a party, or after a home renovation. A one-time deep cleaning covers everything from top to bottom.
Special occasion cleaning services usually include:
Cleaning floors, walls, and baseboards
Cleaning appliances like the oven and fridge
Washing windows and mirrors
Cleaning behind large furniture
These deep cleanings make sure every part of your home is spotless.
How to Get the Most Value from Your Cleaning Service
To get the best out of your cleaning service, follow these tips:
Tell the cleaners what you need: If there are certain areas that need extra attention, like the bathroom or kitchen, let your cleaners know.
Keep up with small tasks: Doing basic chores between cleanings can help keep your home in better shape.
Ask about eco-friendly cleaning products: If you prefer natural cleaning products, ask if they offer green cleaning options.
Conclusion: Professional Cleaning Is Worth It
So, how often should you hire a professional cleaning service? It depends on your home, but regular cleaning is always a good investment. Whether it’s weekly, bi-weekly, or monthly, having a cleaner home will save you time and help you enjoy a healthier space.
At Gloria Cleaning, we offer cleaning services that can be customized to fit your schedule and budget. Contact us today to schedule your cleaning or get a free estimate!
At Gloria Cleaning, we understand how important it is to live in a clean and organized space. Whether you’re in the Bronx or Manhattan, a clean apartment is key to feeling comfortable and healthy. We specialize in apartment cleaning services in Bronx & Manhattan, and we offer top-notch cleaning solutions that fit your needs. In this blog, I will explain why you should choose us for your apartment cleaning and how our services stand out.
Why Choose Us for Apartment Cleaning Services in Bronx & Manhattan?
Living in a busy city like New York can make it hard to keep your apartment clean. Between work, school, or just life in general, cleaning often falls to the bottom of the list. That’s where we come in! We can help you maintain a clean apartment, making your life easier. Here’s what makes us the best choice for apartment cleaning in the Bronx and Manhattan:
Experienced Cleaners Who Pay Attention to Detail Our cleaning team knows how to take care of every part of your apartment. Whether it’s dusting, vacuuming, or cleaning your kitchen and bathrooms, we make sure every spot is clean.
Safe and Eco-Friendly Cleaning Products At Gloria Cleaning, we care about your health and the environment. We only use eco-friendly cleaning products that are safe for you, your pets, and the planet. You can feel good about having a clean home without harming the environment.
Flexible Scheduling We understand that everyone has a busy schedule. That’s why we offer flexible cleaning times that work for you. Whether you need weekly, bi-weekly, or a one-time clean, we will find the best time that fits into your day.
Complete Cleaning Services We offer a wide range of cleaning services to meet all your needs. From kitchen cleaning to bathroom sanitizing and even upholstery cleaning, we make sure your entire apartment is spotless.
What Services Do We Offer for Your Apartment?
We provide different cleaning services to match the needs of your apartment in the Bronx or Manhattan. Here are the services we offer:
Basic Apartment Cleaning: If you need a simple cleaning, we can take care of dusting, vacuuming, and wiping down surfaces. It’s perfect for regular cleaning to keep your apartment looking great. For details, visit our residential cleaning service.
Deep Cleaning: For a more thorough cleaning, we focus on the areas you might miss, like baseboards, behind appliances, and vents. Deep cleaning helps get your apartment completely clean.
Move-In/Move-Out Cleaning: Moving into or out of an apartment? We’ll clean your space so it’s fresh and ready. This is perfect if you want a spotless apartment for a new move or when you’re leaving. Our move-in/move-out cleaning service is just what you need.
Upholstery and Carpet Cleaning: If your couch or carpet needs extra care, we offer special cleaning services that remove dirt, stains, and odors.
Post-Construction Cleaning: After any home renovation, there’s often dust and debris left behind. Our cleaning team will handle the mess, leaving your apartment looking brand new.
Why Regular Apartment Cleaning is Important
Regular cleaning isn’t just about how your apartment looks. It also helps your health. A clean apartment can reduce dust, allergens, and bacteria, making it a healthier place to live. With Gloria Cleaning, we focus on making your apartment a cleaner, safer, and more comfortable environment for you and your family.
We Clean Apartments in the Bronx & Manhattan
We proudly clean apartments all over Bronx and Manhattan. Whether you live in the heart of Manhattan or in the neighborhoods of the Bronx, we are ready to help you. To find out more about the areas we serve, check out our location page.
Why Professional Cleaning Makes a Difference
When you hire a professional cleaning service like Gloria Cleaning, you get better results than if you try to clean your apartment yourself. Our cleaning team has the right equipment and experience to make sure your apartment is as clean as possible. Plus, with our affordable pricing, you get great value for your money. You can see our pricing options by visiting our pricing section.
For a cleaner and healthier apartment, you can trust Gloria Cleaning to provide apartment cleaning services in Bronx & Manhattan that are the best in the business.
Ready to Book a Cleaning?
At Gloria Cleaning, we’re dedicated to giving you a clean apartment that meets all your needs. Whether you need a regular cleaning or a specialized service, we’re here to help. For more information or to schedule your cleaning, contact us today!
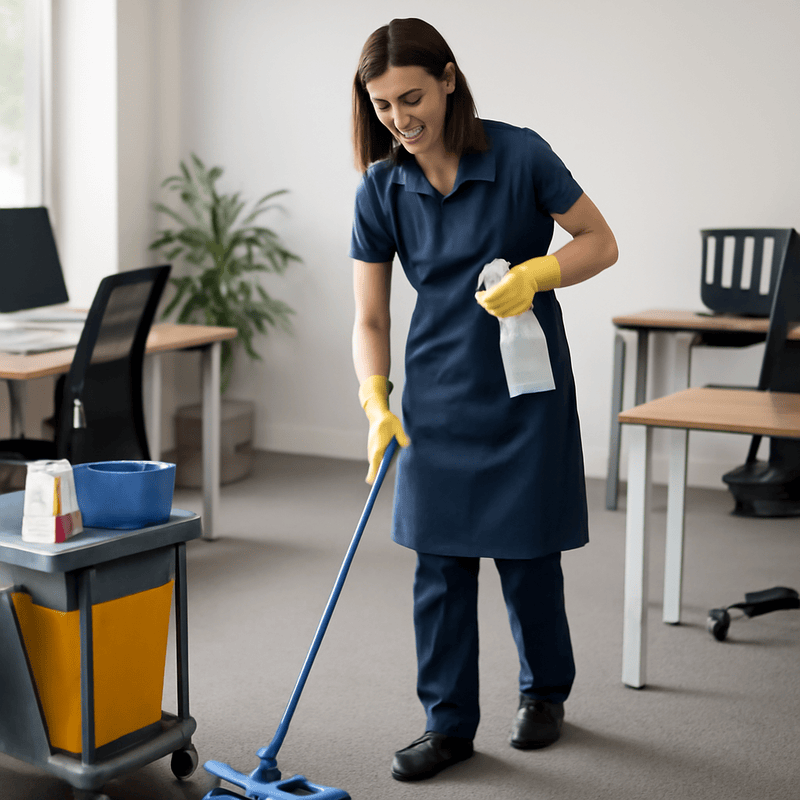
As a professional cleaner with years of experience, I know how important it is to keep your office clean and healthy. Whether you have a small business or a large company in Manhattan, office cleaning services are key to making sure your employees and clients stay healthy and happy. A clean office also helps your employees be more productive, keeps germs away, and leaves a great impression on visitors.
In this blog post, I’ll explain everything you need to know about office cleaning services in Manhattan. I’ll talk about the different types of cleaning options available, why hiring a cleaning company is a smart choice, and how our services can help meet your specific needs.
Why Office Cleaning is Important in Manhattan
Manhattan is a busy place with a lot of people, and it’s full of offices from every kind of business. With so many people walking around, dirt, dust, and germs build up fast. A messy office can make your business look unprofessional, and it can affect your employees’ health and productivity.
Benefits of Office Cleaning Services:
Healthier Workspace: A clean office helps reduce germs and allergens. This means fewer sick days and a healthier environment for everyone.
More Productive Employees: A clean workspace helps employees stay focused and work better. When things are neat, there are fewer distractions, and employees can get more done.
Professional Image: A clean office shows that you care about your business. It makes a great first impression on clients, visitors, and job applicants.
Save Money Over Time: Regular cleaning helps keep your office furniture, carpets, and equipment in good shape. This can save you money by preventing damage and wear.
Types of Office Cleaning Services We Offer
Our office cleaning services in Manhattan are designed to meet the needs of any business. Whether you need a one-time deep cleaning or regular cleaning, we have the services you need.
1. Commercial Office Cleaning in Manhattan
We offer professional commercial cleaning services for businesses of all sizes. Our team makes sure every part of your office is clean, including the floors, windows, desks, and restrooms. We pay attention to every detail, making sure your office looks its best.
Medical offices need extra care when it comes to cleanliness. Our medical office cleaning services use special disinfectants to ensure your office stays germ-free and safe for your patients and staff.
3. Deep Cleaning Services for Small Offices
Even small offices need deep cleaning now and then. Our deep cleaning services cover tasks like shampooing carpets, dusting hard-to-reach areas, and cleaning every corner of your office to make it fresh and clean.
4. Daycare and Child Care Center Cleaning Services
If your office is also a daycare or has a children’s area, cleanliness is especially important. We offer daycare cleaning to keep the space safe and clean for kids and staff.
5. Post-Event Office Cleaning
If you’ve hosted an event in your office, the cleaning afterward can feel like a big job. Our post-event cleaning service will help clean up quickly and efficiently, so you can get back to work without stress.
Why Choose Us for Office Cleaning Services in Manhattan?
When you need your office cleaned, you want professionals who know what they’re doing. Here’s why our office cleaning services in Manhattan are the best choice:
1. Experienced Cleaning Team
Our team is highly trained and knows how to clean offices of all sizes. We make sure every office gets the best care and cleaning possible.
2. Eco-Friendly Cleaning Products
We care about the planet and use cleaning products that are safe for both your office and the environment. Learn more about our eco-friendly cleaning.
3. Customized Cleaning Plans
We understand that every office is different. That’s why we offer customized cleaning schedules. Whether you need cleaning daily, weekly, or monthly, we’ll create a plan that works for you.
4. Comprehensive Cleaning Services
Our services cover all areas of your office, from desks and floors to restrooms and windows. We make sure everything is cleaned, leaving your office spotless.
5. Reliable and Timely Service
We know how important it is to stick to a schedule. Our team works quickly and efficiently, so we don’t interrupt your office’s daily activities. We also offer flexible scheduling to fit your needs.
6. Affordable Pricing
We believe in offering high-quality cleaning at prices that won’t break the bank. We have clear pricing with no hidden fees, so you only pay for the services you need.
How Often Should You Schedule Office Cleaning?
The amount of cleaning your office needs depends on its size and the number of employees. Here are some general guidelines:
Daily Cleaning: For busy offices with lots of employees, daily cleaning is best. This includes cleaning bathrooms, emptying trash, and wiping down surfaces.
Weekly Cleaning: For smaller offices, weekly cleaning may be enough. We can focus on things like vacuuming carpets, cleaning windows, and dusting furniture.
Monthly or Quarterly Cleaning: If you don’t need frequent cleaning, a monthly or quarterly deep cleaning might work for you. This can include floor waxing and cleaning hard-to-reach spots.
How Our Office Cleaning Service Works
Step 1: Initial Consultation
We start by discussing your office’s needs. We’ll ask about the size of your office, what areas need cleaning, and how often you want us to come.
Step 2: Custom Cleaning Plan
After the consultation, we create a customized cleaning plan. We’ll outline what services we’ll provide and when we’ll do them.
Step 3: Cleaning Day
On the scheduled day, our team will arrive ready to clean. We bring all the cleaning supplies we need, so you don’t have to worry about anything.
Step 4: Ongoing Support
If you need to change your cleaning plan or have special requests, we’re always here to help. Just let us know!
Why Office Cleaning is More Important Than Ever
Since the COVID-19 pandemic, people are more focused on cleanliness than ever before. It’s important to make sure your office is not only clean but also disinfected. Our electro-static cleaning uses the latest technology to disinfect your office, helping to stop the spread of harmful germs.
Clean Office = Happy Employees
Studies show that employees are happier and work better in clean offices. A tidy space makes them feel more comfortable and boosts their productivity.
Final Thoughts
Manhattan is an exciting city with so much to do and explore. After your office cleaning is done, take some time to enjoy the sights and sounds of this amazing place.
If you want your office to be cleaner, healthier, and more productive, contact us at Gloria Cleaning Manhattan. We’ll help make your office shine, so you can focus on your business while enjoying everything Manhattan has to offer.
Get a Quote Today!Contact us for more information about our office cleaning services in Manhattan.
New York City is known for its energy, excitement, and famous landmarks. Manhattan, the heart of the city, is full of cool places to visit and exciting things to do. Whether you’re from New York or visiting for the first time, there’s always something new to discover. In this guide, I’m going to share 22 fun things you must check out when you’re in Manhattan!
1. Central Park: A Huge Park Right in the City
If you’re in Manhattan, you can’t miss Central Park. This huge park is the perfect place to relax. You can go for a walk, have a picnic, or even rent a Citi Bike to ride around. There are also cool places to see, like Belvedere Castle and Strawberry Fields, which is a memorial for John Lennon.
2. The Statue of Liberty: A Symbol of Freedom
One of the most famous symbols of America is the Statue of Liberty. You can take a ferry from Battery Park to visit the statue and also see Ellis Island, where many immigrants arrived in the U.S. a long time ago.
3. The Empire State Building: Amazing Views of the City
The Empire State Building is one of the tallest buildings in New York. You can go up to the observation deck on the 86th floor and get an amazing view of the city. It’s especially beautiful at night when all the lights are on!
4. Broadway: See a Show
If you like plays and musicals, you have to go to Broadway! It’s the best place to see famous shows like The Lion King or Aladdin. You can buy tickets in Times Square or try to get cheaper tickets at the TKTS booth.
5. The High Line: A Park on a Bridge
The High Line is a park built on an old train track above the city streets. It has beautiful plants, art, and great views of Hudson Yards and the Hudson River. It’s a nice, quiet place to walk and enjoy nature in the middle of the busy city.
6. One World Trade Center: A Tower of Strength
TheOne World Trade Center, also known as the Freedom Tower, is one of the tallest buildings in the U.S. You can go up to the One World Observatory for a panoramic view of the city. It’s also near the 9/11 Memorial, where you can remember the events of September 11, 2001.
7. Times Square: The Bright Lights of the City
Times Square is one of the busiest places in the world. It’s filled with bright billboards, street performers, and tons of people. It’s also home to New Year’s Eve Ball Drop, a big event that happens every year on December 31st.
8. Washington Square Park: A Fun Place to Hang Out
Washington Square Park is a great spot to relax in the middle of the city. Located in Greenwich Village, it has a big arch and a fountain, and you’ll often see street musicians or artists. It’s a great place to hang out and people-watch.
9. The Vessel: A Cool New Building
The Vessel is a new building that looks like a giant honeycomb. You can climb the stairs to the top and get an awesome view of the Hudson Yards area. It’s an Instagram-worthy spot for photos!
10. The Museum of Modern Art (MoMA): A Place for Art Lovers
If you love art, you’ll enjoy MoMA. It’s home to amazing artwork from famous artists like Vincent van Gogh and Pablo Picasso. MoMA has everything from paintings to modern sculptures, and it’s a great place to spend a few hours.
11. The Guggenheim Museum: A Unique Museum
The Guggenheim Museum is famous for its unique spiral-shaped building designed by Frank Lloyd Wright. Inside, you’ll find contemporary art from around the world. It’s a fun museum to explore, both for its art and its cool design.
12. Little Italy: Taste the Best Italian Food
Little Italy is full of Italian restaurants, cafes, and shops. If you’re a fan of pizza or pasta, you’ll love it here. Be sure to try the gelato for a sweet treat while you walk around the neighborhood.
13. Chinatown: Explore the Streets of Asia
Manhattan’s Chinatown is a lively neighborhood with great food, unique stores, and a rich history. You can try dim sum, shop for souvenirs, or visit historic temples. It’s a fun place to experience another culture.
14. Brooklyn Bridge: Walk Across the River
The Brooklyn Bridge is one of the most famous bridges in the world. You can walk across it from Manhattan to Brooklyn, enjoying views of the river and both boroughs. It’s a great way to see the city from a different perspective.
15. Battery Park: A Quiet Place by the Water
If you want to relax and enjoy views of the Statue of Liberty and the Harbor, visit Battery Park. It’s a peaceful place to walk around, and you can also hop on a ferry to visit the Statue of Liberty or Ellis Island.
16. SoHo: A Shopping Destination
SoHo is a trendy neighborhood in Manhattan where you can shop at cool boutiques and art galleries. Whether you’re looking for clothes, accessories, or art, SoHo has a lot to offer. It’s a great place to find something special.
17. Grand Central Terminal: A Historic Train Station
Grand Central Terminal is not just a train station; it’s a historical landmark with beautiful architecture. The astronomical clock and the main concourse are stunning, and there’s even a whispering gallery where you can hear voices from across the room!
18. Hudson Yards: A Modern Neighborhood
Hudson Yards is a new neighborhood full of high-rise buildings, shopping centers, and restaurants. One of the biggest attractions here is the Vessel, but you can also visit the Edge—an outdoor sky deck with glass floors offering incredible views of the city.
19. The Oculus: A Cool, Futuristic Building
The Oculus is a modern building located in Lower Manhattan. It’s a transportation hub and a mall, but its design looks like a giant bird spreading its wings. It’s a great place to visit and take photos.
20. The 9/11 Memorial: Remembering the Past
The 9/11 Memorial is a place of remembrance and reflection. It has two large reflecting pools where the original Twin Towers stood. It’s a peaceful and meaningful place to visit to honor the lives lost during the tragic events of 2001.
21. Top of the Rock: Stunning Views from the Sky
For a beautiful view of the city, visit theTop of the Rock at Rockefeller Center. From here, you can see the Empire State Building, Central Park, and the whole city. It’s a great spot to take pictures and see the city from above.
22. Chelsea Market: A Foodie’s Dream
Chelsea Market is an indoor food market filled with delicious food stalls. Whether you’re craving seafood, tacos, or a sweet dessert, there’s something for everyone here. It’s a great place to grab lunch or just snack while you explore the city.
Conclusion: Enjoy Your Time in Manhattan!
Manhattan has something for everyone, from historical landmarks and amazing food to world-class museums and fun activities. No matter what you’re interested in, you’ll find something exciting to do. While you’re exploring the city, remember to keep things clean, and if you need help with cleaning, Gloria CleaningManhattan is here for you. We offer top-notch residential cleaning and commercial cleaning services in Manhattan, so you can enjoy a clean space while having fun!
For more information about our services, visit Gloria Cleaning.
When it comes to keeping your business clean, hiring the best commercial cleaning services in Queens is very important. Whether you run an office, daycare, or healthcare facility, cleanliness is key. Not only does it help keep your space healthy, but it also creates a positive first impression for your clients and employees. At Gloria Cleaning, we offer top-quality cleaning services in Queens, NY, that cater to all kinds of businesses. Let me tell you why we’re the best choice for all your cleaning needs.
Why Gloria Cleaning is the Best Choice in Queens
At Gloria Cleaning, we provide professional commercial cleaning services in Queens, NY. Our team is trained, reliable, and equipped with the best tools to make sure your space looks great. Here’s what makes us stand out from other cleaning companies:
Experienced cleaners who know how to handle different types of businesses.
Eco-friendly cleaning products that are safe for everyone.
Customized cleaning plans that fit your business’s needs.
Whether you need regular cleaning or a one-time deep clean, we’re here to help. Let’s look at the services we offer in commercial cleaning in Queens.
Our Commercial Cleaning Services in Queens
1. Office Cleaning in Queens
A clean office is crucial for a productive work environment. We offer full office cleaning services in Queens that include dusting, vacuuming, wiping surfaces, and cleaning bathrooms. Our team makes sure your office looks spotless and welcoming.
Cleaning a daycare is different from other places. Children’s health is very important, so we make sure to use safe, non-toxic cleaning products. We clean play areas, classrooms, and kitchens, ensuring everything is sanitized and safe for the kids.
Hospitals and medical offices need extra care when cleaning. Our hospital cleaning services follow strict rules to ensure everything is sanitized properly. We clean waiting rooms, exam rooms, and other areas to prevent the spread of germs and infections.
Whether you have a store or a recreational center, keeping it clean is important for your customers. We clean floors, bathrooms, and common areas to make sure your place is safe and attractive to visitors. Our team also specializes in cleaning gyms and recreational centers.
Learn more about our recreational center cleaning services here.
5. Floor Care and Polishing
Your floors take a lot of wear and tear. We offer commercial floor cleaning services in Queens, including sweeping, mopping, and floor polishing. We’ll make sure your floors shine and stay in great condition.
At Gloria Cleaning, we have years of experience providing cleaning services to businesses in Queens. Our team knows what it takes to keep every space clean and healthy. We are experts in all types of commercial cleaning, from office cleaning to medical facility cleaning.
Eco-Friendly Cleaning Products
We care about the environment and your health. That’s why we use safe and eco-friendly cleaning products. Our cleaning solutions are effective but gentle, so they are safe for both people and pets.
Reliable and Flexible Service
We understand that your business runs on a schedule, and we work around that. Whether you need cleaning every day or once a week, we are flexible to meet your needs. We pride ourselves on being reliable and consistent.
Affordable Pricing
We know that cost is important to businesses. That’s why we offer competitive pricing for all our commercial cleaning services in Queens. We make sure you get great value without breaking the bank.
Want to get an idea of our prices? Visit our pricing page for more information.
Conclusion: A Clean Business is a Successful Business
When you need the best commercial cleaning services in Queens, Gloria Cleaning is here to help. We offer top-notch cleaning services for offices, daycares, healthcare facilities, and more. Our experienced team uses eco-friendly products to ensure your space is clean, healthy, and safe.
To learn more or schedule a cleaning, visit our commercial cleaning services page. Let us help you keep your business clean and professional!
When it comes to keeping your home, office, or business clean, finding the best cleaning services near Manhattan is important. At Gloria Cleaning, we offer top-quality cleaning services that are perfect for any space. Whether you need help with your home or your office, we have the experience to get the job done right. Let’s explore why we’re the best choice for cleaning services in Manhattan.
Why Choose Gloria Cleaning?
At Gloria Cleaning, we know that a clean space helps create a happy, healthy environment. With years of experience, our team is dedicated to providing high-quality cleaning services that meet your needs. We take pride in offering a job well done every time, ensuring your space is spotless.
We use eco-friendly cleaning products and the latest cleaning techniques, so your home or business looks great and stays safe. Our focus is always on your satisfaction. We want you to feel proud of your clean space.
Our Cleaning Services
We offer a wide variety of cleaning services to help keep your space looking its best. No matter what type of cleaning you need, we can help. Here are some of the services we offer:
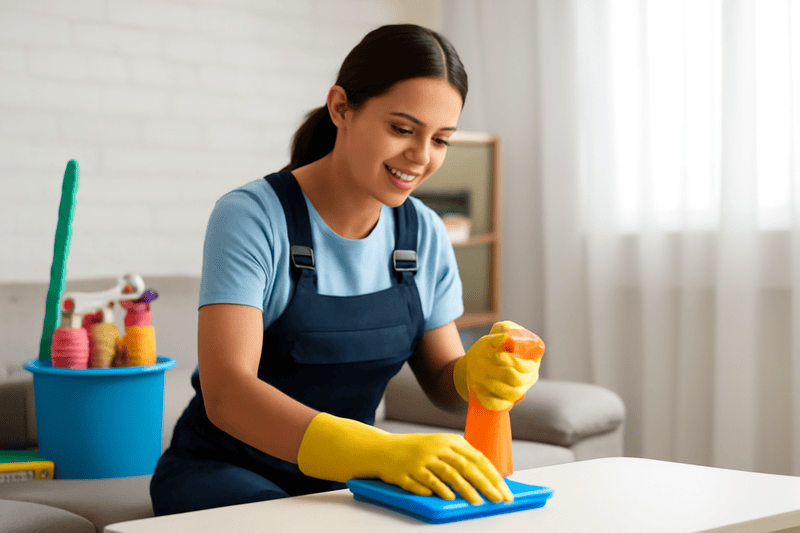
1. Residential Cleaning
Your home should always feel like a relaxing sanctuary. Our residential cleaning services are designed to make your home look great, whether you need regular cleaning or a deep clean for a special occasion. We’ll make sure your house sparkles, so you can enjoy your time at home without the stress of cleaning.
2. Commercial Cleaning
A clean business space is key to making a great first impression. Whether it’s a hospital cleaning, daycare cleaning, or office cleaning, we specialize in keeping your business clean and professional. A clean workplace helps keep employees healthy and boosts productivity.
3. Specialized Cleaning
Some spaces need special care, and we’re here to help. From mold removal to trauma cleaning, we provide expert cleaning services for difficult jobs. No matter the challenge, we’ve got you covered.
4. Upholstery and Carpet Cleaning
Your furniture and carpets can get dirty over time, but we know how to clean them right. Our expert upholstery cleaning and carpet cleaning services remove dust, dirt, and allergens, making your home or office cleaner and healthier.
5. Post-Construction Cleaning
After a construction project, there’s usually a lot of dust and debris. Our post-construction cleaning team makes sure your new space is clean and ready to be used.
Why Professional Cleaning Matters
Hiring professional cleaners, like Gloria Cleaning, has many benefits:
Saves Time: Instead of spending hours cleaning, let us do the work while you focus on other things.
Better Results: We have the right tools and experience to clean better than you can on your own.
Healthier Environment: Regular cleaning removes allergens, dust, and germs, which helps keep your space healthier.
Gloria Cleaning’s Commitment to Quality
At Gloria Cleaning, we’re known for our expertise and experience. Our team uses only the best equipment and cleaning methods to make sure every job is done right. We care about the quality of our work and the happiness of our clients. Our goal is to create a clean space that you’ll love.
We also use eco-friendly cleaning products, which are safe for you, your family, and the environment. By choosing Gloria Cleaning, you’re making a smart choice for both your home and the planet.
The Best Cleaning Services Near Manhattan
If you’re looking for the best cleaning services near Manhattan, look no further than Gloria Cleaning. We offer a wide range of services for both homes and businesses. From regular cleaning to special jobs, we have the experience and dedication to get your space looking its best.
Ready for a clean, fresh space? Contact us today for a free estimate. We look forward to helping you enjoy a cleaner, healthier environment!
For more cleaning tips and advice, check out our blog, where we share helpful cleaning guides and tips.
Cement can get dirty over time. Whether it’s your driveway, patio, or garage floor, dirt, grime, and stains can make it look worn out. Many people think they need a power washer to clean cement, but that’s not always the case. In this guide, I’ll show you how to clean cement without a power washer using simple tools and easy steps.
Why Should You Clean Cement?
Cement is strong and durable, but it can collect dirt and stains because it’s porous (it has small holes). Over time, dirt can make the surface look dull and even slippery. Cleaning cement regularly can keep it looking nice and prevent damage. So, let’s dive into how you can do this without a power washer.
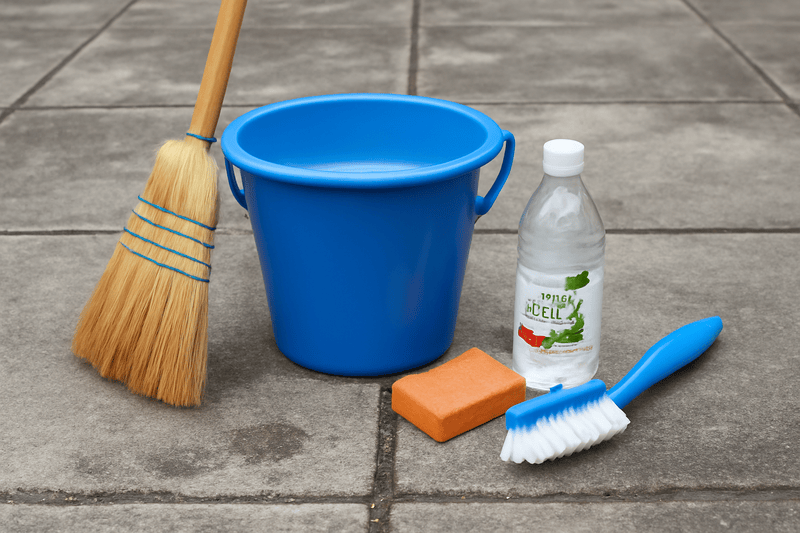
1. Gather Your Cleaning Supplies
You don’t need fancy tools to clean cement. Here’s what you’ll need:
Broom or Vacuum: To remove dirt and debris.
Dish Soap or Laundry Detergent: Mild enough to clean without harming the cement.
Baking Soda: Great for tough stains.
Vinegar: Helps cut through grease and grime.
Scrub Brush: To scrub away the dirt and stains.
Bucket: To mix your cleaning solution.
Most of these items are in your home already, making this method easy and cheap!
2. Sweep or Vacuum First
Before you start cleaning, it’s important to remove any loose dirt or debris. Sweep the area with a broom or use a vacuum if you have one. This step helps you clean more efficiently and prevents dirt from being scrubbed into the cement.
3. Make Your Cleaning Solution
Now, let’s make a simple cleaning solution! Mix the following ingredients in a bucket:
1/2 cup of dish soap (or laundry detergent)
1 cup of vinegar
2 cups of warm water
This mixture works great for general dirt and grime. If you have stubborn stains, sprinkle baking soda on the stain before scrubbing.
4. Scrub the Cement
Once your cleaning solution is ready, use a scrub brush to apply it to the cement surface. Work in small sections, scrubbing in circles to get rid of dirt. For tough stains, let the cleaning solution sit for about 15-20 minutes to break down the grime, then scrub it again.
If you need extra help removing stains, sprinkle some baking soda on the area and scrub with the brush. The baking soda will act as a gentle scrubber.
5. Rinse and Dry
Once you’re done scrubbing, rinse the cement with clean water. You can use a hose or just pour water from a bucket and wipe it off. Make sure you rinse well to get rid of any soap or cleaning solution residue. Then, let the cement dry. It should look a lot cleaner now!
6. Final Touch: Use a Mop
If you’re cleaning cement inside your house, like in a basement or garage, you can use a mop to give it a final clean. This helps get rid of excess water and gives the cement a nice finish. Just mop the floor and let it dry.
Extra Tips for Keeping Cement Clean
Seal Your Cement: After cleaning, you can seal the cement to protect it from stains and dirt. This will make future cleanings easier.
Clean Regularly: Cleaning your cement once every few months will help keep it looking fresh. You won’t need to do a big scrub as often if you clean it regularly.
Clean Grout Lines: If your cement has grout lines (like in tiles), use a toothbrush with the same cleaning solution to scrub them.
Conclusion
Cleaning cement without a power washer is easier than you think. All you need are some common household items, a little elbow grease, and a bit of patience. You’ll be amazed at how fresh and clean your cement surfaces can look.
If you need more cleaning tips, take a look at our specialized cleaning services for expert advice or services. We’re here to help you keep your cement and other surfaces looking great!
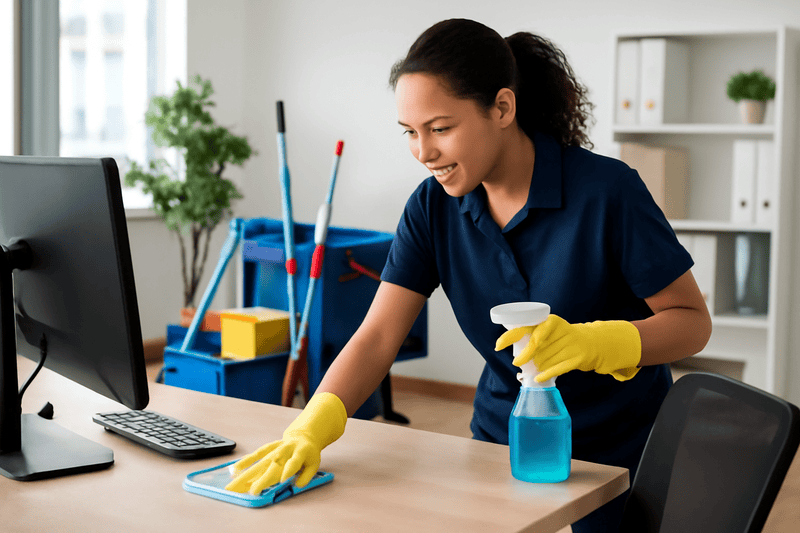
Keeping your office clean is more than just making it look nice. It’s about creating a healthy environment where everyone can feel comfortable and productive. As a professional cleaning service, I know how important it is to go beyond just wiping down the surfaces. Deep hygiene cleaning is the key to keeping your office safe and healthy.
In this blog, I’ll explain why office cleaning for deep hygiene is so important and how our services can help make your workspace cleaner and safer for everyone.
Why Office Cleaning for Deep Hygiene is Essential
We all know the basics of cleaning — dusting, vacuuming, and wiping down surfaces. But deep hygiene cleaning is about going the extra mile to make sure your office is completely germ-free. When you think about all the things you touch in a day — keyboards, door handles, phones — it’s easy to see how germs can spread. A clean office can help prevent illnesses and make your workplace more comfortable for everyone.
Here’s why office cleaning for deep hygiene is so important:
Stops the Spread of Germs and Illness Regular cleaning can help stop germs from spreading, especially in places like desks, light switches, and kitchen areas. Deep hygiene cleaning targets these high-touch areas, helping to stop sickness before it starts.
Improves Air Quality Deep cleaning isn’t just about surfaces. It also includes cleaning carpets and upholstery, which can trap dust and allergens. A cleaner office means cleaner air, which helps reduce allergies and other health problems.
Helps People Stay Productive A clean office is a more productive office. When employees aren’t distracted by dirt or clutter, they can focus better on their work. Plus, a clean space just feels better to be in!
Boosts Employee Happiness When you care about keeping the office clean and hygienic, employees feel appreciated. It shows you care about their health and well-being, which can boost morale.
What Does Office Cleaning for Deep Hygiene Include?
At Gloria Cleaning, we provide a full range of cleaning services to make sure your office stays in top shape. Here’s what we do to ensure deep hygiene:
Disinfecting High-Touch Surfaces: We clean and disinfect areas like light switches, door handles, phones, and keyboards — places where germs often spread.
Cleaning Carpets and Furniture: We use special equipment to clean carpets and upholstery, removing dust and allergens for a fresher environment.
Floor Care: We don’t just sweep the floors — we deep clean, scrub, and wax hard floors to make them shine.
Sanitizing Bathrooms: Bathrooms are a breeding ground for germs. We make sure to disinfect all surfaces, including toilets, sinks, and counters.
Trash Removal: We remove trash and recycling regularly to prevent odors and clutter from building up.
The Benefits of Hiring Professional Cleaners
Expert Cleaning: Our team is trained to handle every kind of mess. With the right tools and products, we can clean even the toughest spots and germs.
Healthier Environment: Deep cleaning means less dust, fewer germs, and better air quality — all of which contribute to a healthier office.
Customized Cleaning Plans: We know every office is different. That’s why we offer cleaning plans that work best for your space.
Save Time and Money: Hiring professionals to clean regularly can save you time and money in the long run by preventing costly repairs or replacements for dirty office equipment.
Eco-Friendly Cleaning: We use safe, eco-friendly cleaning products to protect both the environment and the health of your employees.
Why Choose Gloria Cleaning?
At Gloria Cleaning, we are experts in deep hygiene office cleaning. We provide a thorough cleaning service that targets every corner of your office, leaving it spotless and safe for your team.
Ready to make your office healthier and cleaner? Contact us today to schedule a consultation and learn more about our cleaning services.
For more information about our pricing, visit our pricing page.
Conclusion
Deep hygiene cleaning is essential to keeping your office safe, healthy, and productive. By choosing Gloria Cleaning, you ensure that your office gets the care and attention it needs. Don’t wait — book your cleaning service today and create a healthier workplace for everyone!
Trust Gloria Cleaning to keep your office clean and hygienic, so you can focus on what matters most — your work.